Creating personality tests helps you to increase your website traffic, generate more leads, engage, and target the audience. All your website visitors feel special and unique as each of them has special characteristic traits and gets an advanced personality analysis.
Also, by asking personal questions to users, you can learn more about the interests of your website visitors and provide them with more impressive content.
Moreover, you can collect information (name and email address) from the users to target them and create an email marketing campaign for them.
Creating a Personality Quiz in Shopify with Advanced Features (5 steps) #
To build a personality quiz in Shopify with all the advanced settings and functionalities, you’ll need the Premium version of the Best Personality Power Quiz app. This plugin includes all the essential features to create a personality quiz in just a few minutes.
This section is for those already familiar with the app’s functionalities and basic quiz creation steps. Here, we’ll go through the process of setting up a personality traits test step by step.
Start by downloading and installing the Best Power Quiz app on your Shopify dashboard. Then:
- Navigate to the Power Quiz Dashboard and create your questions one by one. Assign keywords to each answer option. Since the weight/point system is not relevant for personality assessments, you can set it to 0 for all answer options. If needed, you can also add images to each answer choice. Once your questions are ready, add them to your quiz.
- Go to the Settings tab and disable the Show correct answers option.
- Enable the Information Form option under the User Data tab. Drag and drop your preferred fields from Available Fields to Active Fields to collect user information.
- Configure the results settings by navigating to the Results Settings tab. Select the Hide score option, then scroll down and enable Show interval message. Choose the By keywords method for interval calculation, enter the interval texts accordingly, and save the changes.
- Finally, copy the quiz embed code and paste it into your preferred Shopify post or page.
That’s it—your personality quiz is now ready! As you can see, creating an advanced personality test is simpler than you might expect.
In the next section, we’ll go through each of these steps in detail, with examples from the Shopify Dashboard. Stay tuned to discover all the great features this plugin offers. Let’s get started!
Step-by-step guide on how to make an advanced personality quiz #
The Quiz Maker plugin offers an excellent way to create an engaging personality test that will captivate your website visitors. By doing so, you can gain valuable insights into your audience’s preferences and enhance their overall experience.
Now, let’s go through the essential steps to set up a personality quiz in Shopify.
Step 1 #
Navigate to the Power Quiz plugin and open the Questions page. Click on the Add New button to start creating personality test questions. There are no limits to the number of questions or answers you can include. Additionally, you have the option to attach images to each answer choice if needed.

It is crucial to correctly configure the keywords for each answer option. Assign distinct keywords (such as A, B, C, D, etc.) to different answer choices to ensure accurate results. Additionally, you have the flexibility to reorder the answer options as needed.
Since this is a personality quiz, there are no right or wrong answers. Therefore, when creating a psychological test, you can disregard the weight/point system in the plugin. However, to proceed with saving the changes and moving on to the next question, you will still need to select one answer as “correct” within the system.

After creating all questions, you will need to add them to the particular quiz. For, that you need to head to the Quizzes page > create a new quiz and add them there by clicking on the Add Questions button.
Step 2 #
Next, navigate to the Quizzes page, select the specific quiz, go to the Settings tab, and check if the Show correct answers option is enabled. If it is, make sure to disable it.
This setting highlights correct and incorrect answers with green and red marks during the quiz. However, since a personality test does not have right or wrong answers, this option must be turned off to ensure a proper user experience.

Step 3 #
If you want to gather user information, you can use the Information Form feature in the Power Quiz plugin.
To enable this option, go to Quizzes > select your quiz > User Data tab. Then, decide whether you want the form to appear before or after the quiz. Next, drag your preferred fields (such as Name, Email, etc.) from the Available Fields section and drop them into Active Fields to collect the necessary data.
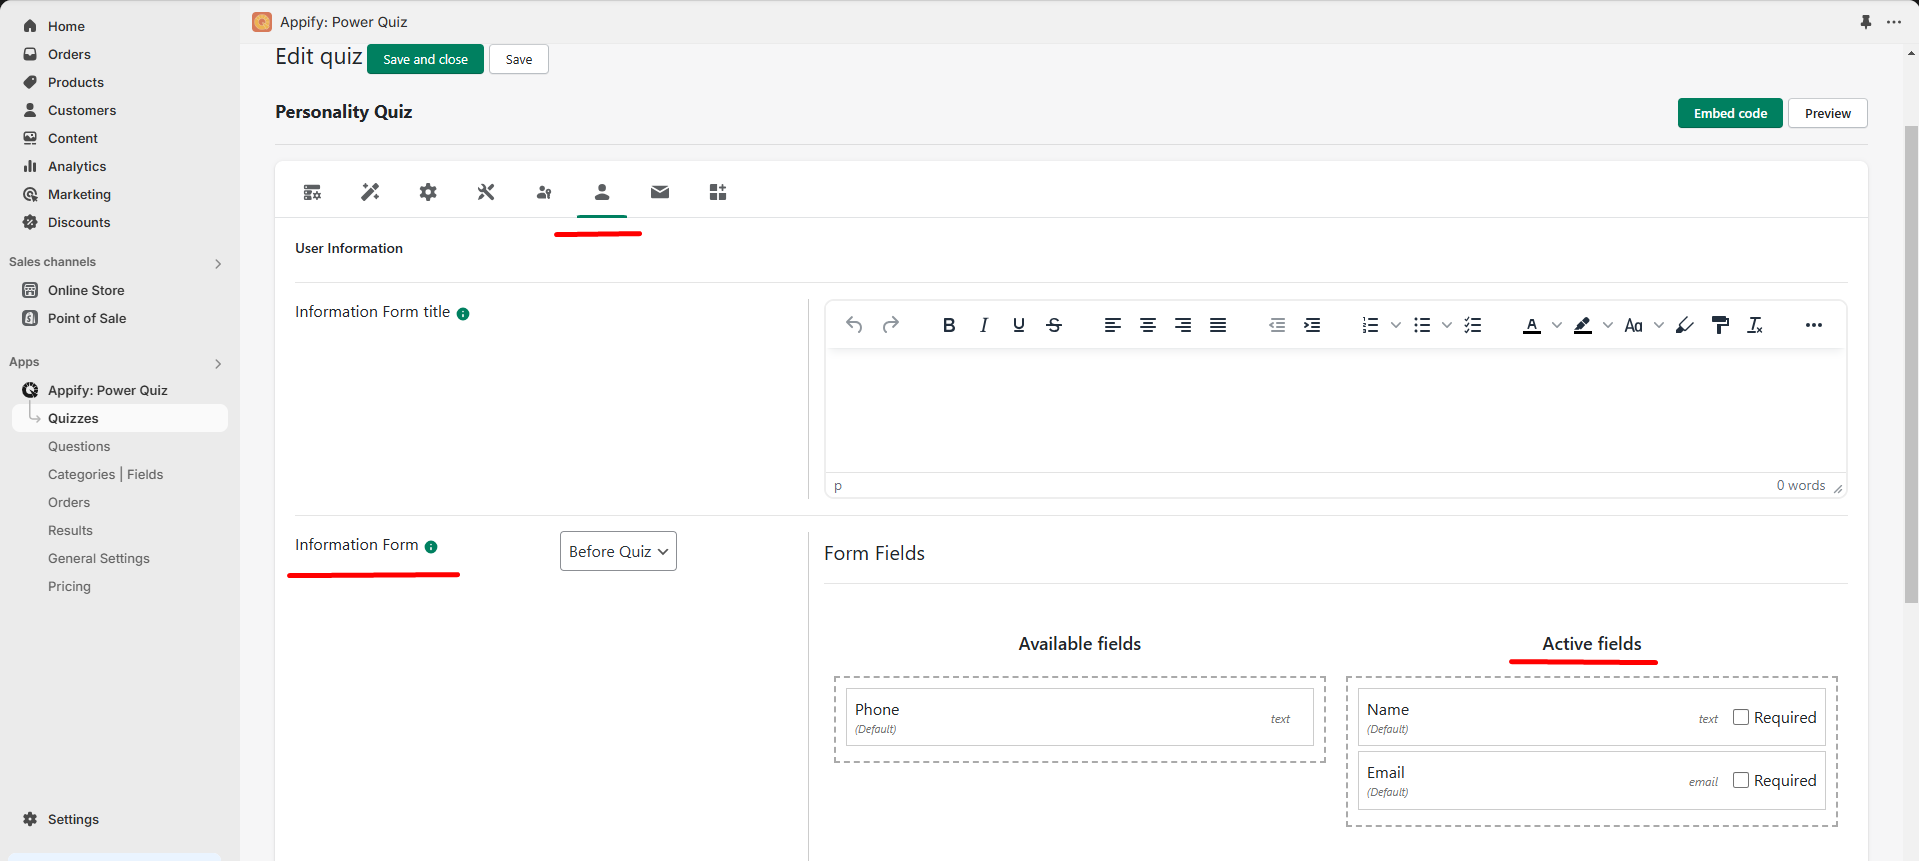
By the way, besides the default fields, the plugin gives the opportunity to create your own custom fields, so that the users can fill in them. To create your own custom fields, you can head to the Power Quiz app > Fields page and add yours. Then, drag and drop them into the Active Fields so that the users can see and fill them on the Front-end.

Step 4 #
Now, it’s time to configure the Results Settings tab, which controls the quiz’s result page.
Since personality quizzes do not use a scoring system, there is no need to display a final score. To prevent this, simply tick the “Hide Score” option.
This ensures that users will not see any numerical scores on the quiz results page, keeping the focus on personality insights rather than point-based evaluation.

Step 5 #
Next, enable the Show Interval Message option. This ensures that a personalized message is displayed on the results page based on the user’s responses.
You can create different texts for each interval, and the system will determine which message to show based on the user’s answers.
When setting up intervals, you will find three calculation methods: By Percentage, By Points, and By Keywords. Since this is a personality quiz, you should select the By Keywords method.
Here’s how it works:
- Choose the keywords that you previously assigned to your answer options.
- Write a unique message for each interval.
- The system will analyze the majority of selected responses and display the most relevant result to the user.
This setup ensures that the quiz provides accurate and meaningful personality-based outcomes.

Additional Advanced Features #
In addition to these powerful functionalities, the Power Quiz plugin offers message variables and shortcodes, allowing you to create a more dynamic and visually appealing quiz experience.
One standout feature is the ability to send interval messages via email to quiz takers, ensuring they receive their personalized results directly in their inbox.
There are two ways to enable this:
- Navigate to Quizzes > select your quiz > Email & Certificate tab.
- Locate the Send email to user option.
- Tick the Send interval message to user checkbox.
By enabling this feature, users will receive their personalized quiz results via email, enhancing engagement and providing a seamless experience.

Why Do People Enjoy Personality Quizzes? #
Personality quizzes are a fun and effortless way to gain insights into one’s own character, preferences, and behavioral patterns. They not only help individuals understand themselves better but also provide valuable perspectives on how others perceive the world and react in different situations.
By taking a personality quiz, users can identify their strengths and weaknesses, improving self-awareness and interpersonal communication. This deeper understanding allows them to empathize with others more effectively, making it easier to relate to different viewpoints and emotions. In essence, personality quizzes encourage people to “step into someone else’s shoes” and see the world from a new perspective.
You’re Ready to Get Started! #
Now that we’ve explored all the advanced and high-quality features, you have everything you need to create an engaging personality quiz that will captivate your audience. As you can see, the process is simpler than you might have thought! With just a few steps, you can build an amazing personality test in minutes using our Power Quiz plugin for Shopify.